Storing Pool Floats and Keeping Them From Blowing Away
This guide shares practical float storage tips, smart DIY hacks, and common mistakes to avoid—so your pool setup stays fun, organized, and frustration-free.
Ever had that perfect pool day ruined when your favorite flamingo float decided to make a break for it across the water? Or maybe you've faced the seasonal struggle of figuring out where to put all those bulky inflatables when summer ends? You're definitely not alone.
We have spent countless hours chasing down runaway floats and trying to cram them into already-packed garage corners. After years of trial and error (and some hilariously failed storage attempts), we have gathered the most practical solutions that actually work for real pools and real families.
Let's solve your float storage headaches and keep those colorful inflatables exactly where they belong—in your pool, not your neighbor's yard!
Why Your Pool Floats Keep Blowing Away
Most people don't realize that custom pool floats are basically colorful sails waiting to catch the slightest breeze. Even on days that don't seem particularly windy, a sudden gust can send your unicorn float sailing across the water in seconds.
The problem gets worse with larger, lighter floats that have more surface area. That giant flamingo inflatable or swimming tube might look amazing on Instagram, but it's also the most likely to take flight when the wind picks up.
What makes this tricky is that many backyards create wind tunnels between houses or fences, causing unexpected air currents right at pool level. Your yard might feel calm where you're sitting, but the pool surface could be experiencing completely different conditions.
Common Mistakes That Make Floats Drift
Several habits make the runaway float problem worse:
- Leaving floats fully inflated - The more air inside, the lighter and more buoyant they become, making them easier to blow away.
- Ignoring weather forecasts - A sudden afternoon thunderstorm can send your entire float collection flying before you get home from work.
- Placing floats in the pool overnight - Evening and early morning hours often have changing wind patterns as temperatures shift.
- Using floats that are too large for your pool - When a float takes up too much surface area, even slight movements push it against the edges where wind can catch it more easily.
- Forgetting about float weight distribution - Floats with uneven weight (like those with cup holders or headrests) tend to spin in the water, making them more likely to catch the wind from different angles.
Best Tips for Pool Float Storage Ideas That Actually Work
Poolside Storage Benches with Hidden Compartments
Poolside storage benches are game-changers for float organization. They serve double duty—providing seating for guests while hiding away your collection of inflatables.
Look for weather-resistant options with waterproof seals to prevent moisture damage. The best designs have hinged tops that stay open while you're loading or unloading floats, preventing pinched fingers or slammed lids.
What works particularly well are benches with internal dividers that let you separate smaller floats from larger ones. This prevents the frustrating "avalanche effect" when you're trying to pull out just one float from the bottom of the pile.
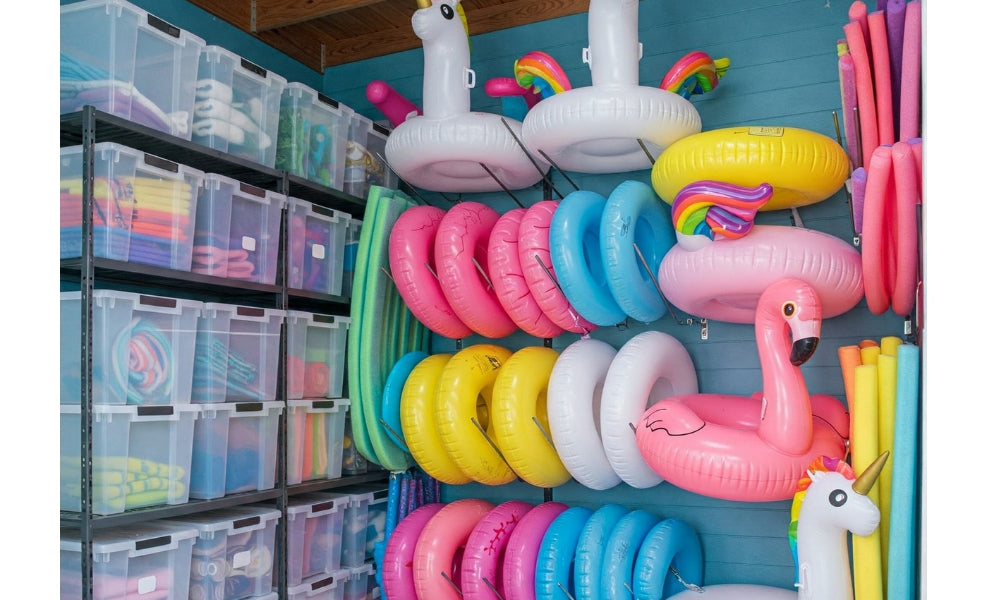
Wall Racks That Keep Gear Off the Ground
Vertical storage is often overlooked but incredibly efficient for pool floats. Wall-mounted racks with multiple hooks or slots can hold several floats without taking up valuable floor space.
The trick is finding racks with the right spacing between hooks—too close together and your floats will be crushed; too far apart and you waste wall space. About 8-10 inches between hooks works well for most standard floats.
If you're renting or can't drill into walls, consider free-standing rack systems that lean against walls but don't require permanent installation.
Mesh Bags That Let Floats Dry and Breathe
Mesh storage bags are perfect for preventing mildew and extending the life of your floats. Unlike solid containers that trap moisture, mesh allows air circulation so floats can fully dry even when stored.
The best mesh bags have drawstring closures and reinforced bottoms to handle the weight of multiple floats. Some even come with shoulder straps, making them easy to carry from pool to storage area.
A smart approach is using color-coded mesh bags—one color for adult floats, another for kids' items, and maybe a third for pool toys and accessories. This simple system makes finding what you need much faster when pool time arrives.
Repurposed Furniture for Double-Duty Storage
You don't always need to buy special storage solutions—many regular furniture pieces can be repurposed for float storage with a little creativity.
Old armoires or wardrobes work wonderfully when placed in covered patio areas. Their tall design accommodates even the largest floats, and doors keep everything hidden from view when not in use.
Wooden crates stacked and secured together create rustic, customizable storage that fits your specific collection. Finish them with weather-resistant sealant, add some casters to the bottom, and you've got mobile float storage that looks intentionally designed.
Space-Saving DIY PVC Float Holders
For the DIY enthusiast, PVC pipe projects offer incredibly effective and affordable float storage. A basic frame built from PVC pipes creates a custom rack that perfectly fits your space and float collection.
The simplest design uses 2-inch diameter PVC pipes arranged in a grid pattern, creating slots where deflated or rolled floats can be inserted vertically. More advanced designs include angled sections that display floats like a retail store would, making selection easier.
What makes PVC solutions great is their adaptability—you can easily add sections as your float collection grows or reconfigure the design if your storage needs change.
What to Avoid When Packing Up Floats
When storing your pool floats, avoid these common mistakes that lead to damaged inflatables and wasted money:
Don't store floats completely wet. Even a little moisture trapped in folds can lead to mildew and unpleasant odors. Take the extra few minutes to towel-dry floats before packing them away.
Avoid folding floats along the same creases repeatedly. This weakens the material at fold points, eventually causing cracks and leaks. Try to vary how you fold them each time, or better yet, roll them instead.
Never store floats near sharp objects or rough surfaces. Even tiny punctures can ruin an inflatable. Keep them away from garden tools, bike pedals, or rough concrete floors.
Don't stack heavy items on top of stored floats. The pressure can damage seams and valves over time. If you must stack, put the lightest items on top.
Avoid extreme temperature fluctuations in storage areas. Attics and uninsulated garages that get very hot or cold can degrade the vinyl material faster. Find a spot with relatively stable temperatures.
Don't use regular plastic bags for storage. They trap moisture and can stick to vinyl surfaces, potentially causing damage when removed. Stick with breathable mesh bags or specialized float storage solutions.
Smart Ways to Stop Floats from Blowing Away
Use of Pool Float Anchors—How They Work
Pool float anchors are simple but effective devices designed specifically to keep inflatables in place. Most consist of a weight attached to a cord or strap that connects to your float.
The basic principle is straightforward: the anchor sits at the bottom of the pool while your float remains on the surface, tethered by the connecting line. The weight needs to be heavy enough to overcome wind and water currents but not so heavy that it pulls down on your float.
Weighted Nets and Cords to Lock Floats in Place
For multiple floats, weighted net systems provide an elegant solution. These consist of a mesh net with weights around the perimeter that you can place over several floats at once.
The net keeps everything contained while allowing floats to move slightly with the water—just not enough to escape. This is particularly useful for kiddie pools with lots of smaller inflatables that would be tedious to anchor individually.
Poolside Hooks and Fasteners That Work in a Pinch
When you need a quick solution, poolside hooks and fasteners can save the day. These temporary attachments secure floats to nearby structures when the pool isn't in use.
Removable suction cup hooks attached to smooth pool walls or glass fencing provide instant anchor points. Just loop a short cord through your float's handle and connect it to the hook when you're taking a break from the pool.
Weighted pool noodles can also serve as improvised anchors. Thread a rope through a pool noodle, fill it with water (which makes it sink), and tie the other end to your float. The water-filled noodle provides enough weight to keep your float from blowing away but is still easy to remove when you want to use the float.
Quick DIY Hacks to Keep Floats Where You Want Them
Sometimes the simplest solutions work best. Try these DIY approaches that use items you might already have:
Fill a plastic water bottle about 3/4 full, cap it tightly, and tie it to your float with a length of nylon cord. The water-filled bottle sinks to the bottom while keeping your float tethered in place.
Repurpose old ankle weights by waterproofing them with plastic wrap and attaching them to the underside of larger floats. The added weight makes the float more stable without affecting its buoyancy too much.
How Often You Should Inspect for Damage
Regular inspections prevent small issues from becoming float-ending disasters. Check your inflatables at these key times:
At the beginning of pool season, thoroughly examine all floats before their first use. Look for any cracks, tears, or valve issues that might have developed during off-season storage.
After heavy use or pool parties, give floats a quick once-over. Rough play often leads to small punctures that are easier to repair when caught early. Having a basic kit for repairing inflatables on hand makes it simple to patch the inflatable for minor damage before it worsens.
Monthly during regular use, inspect seams and high-stress areas like handles and cup holders. These connection points typically fail first and show early warning signs like stretching or discoloration.
Before storing for the season, conduct a detailed inspection including an inflation test. Fully inflate each float and check if it holds air for at least 24 hours. This identifies slow leaks that might not be immediately visible.
Pay special attention to older floats (2+ seasons old). The vinyl becomes more vulnerable to damage with age and exposure, so these need more frequent checks.

Sun Protection for Inflatable Surfaces
UV rays are the number one enemy of pool floats, causing fading, brittleness, and eventually cracking. Protect your investment with these strategies:
Apply a UV protectant spray designed for vinyl surfaces at the beginning of the season and reapply monthly during heavy use. These sprays create an invisible shield against harmful rays.
Store floats in shaded areas when not in use rather than leaving them in direct sunlight. Even a few hours of intense sun exposure can accelerate aging.
Consider using float covers for your most expensive or favorite inflatables. These slip-on protective covers block UV rays while still allowing you to use the float.
Rotate floats regularly if they're sitting in the pool for extended periods. This prevents one side from getting more sun exposure than others, leading to uneven fading and deterioration.
For maximum protection, remove floats from the water when not in use. The combination of sun and chlorine accelerates damage much faster than either factor alone.
FAQs
Where do you store pool floats when not in use?
The best places to store pool floats are in dry, temperature-controlled spaces like garages, garden sheds, or pool houses. If those aren't available, covered outdoor storage benches or deck boxes work well for short-term storage. For apartment dwellers, under-bed storage containers or the tops of closets can accommodate deflated floats during the off-season.
What is the best way to store inflatables?
For long-term storage, partially deflate your inflatables (leaving about 10-15% air inside to prevent the vinyl sides from sticking together), clean them thoroughly, and store them rolled rather than folded. Place them in breathable mesh bags or containers away from sharp objects and extreme temperatures. Adding a silica gel packet helps absorb any residual moisture.
How to make storage for pool floats?
DIY pool float storage can be as simple as installing wall hooks in your garage or as elaborate as building a custom PVC rack. For a quick solution, mount a towel rack horizontally and drape deflated floats over it. For larger collections, create a vertical storage system using bungee cords stretched between hooks to hold floats in place against a wall.
How to store an inflatable pool when not in use?
Clean the inflatable pool thoroughly and let it dry completely. Fold it loosely along different lines each time to prevent crease damage. Store it in its original box if available, or in a plastic container with a secure lid. Place it in a climate-controlled area away from rodents that might chew through the material. Adding cedar blocks or lavender sachets helps deter pests.
How do I keep my pool floats from blowing away?
Use dedicated pool float anchors that attach to your inflatables and sit at the bottom of the pool. Alternatively, create a float corral using a pool noodle connected in a circle with zip ties, or tether floats to poolside hooks when not in use. For a quick fix, attach water-filled plastic bottles to your floats as makeshift anchors.
Is it OK to leave floats in the pool?
It's best not to leave floats in the pool overnight or during extended periods of non-use.